
Settings → Email is where your sending setup lives after onboarding - the email addresses your campaigns send from, and the domains behind them. If you picked a SeekaHost address during onboarding, or you want to add another domain of your own later, this is where that happens. It's also where the optional SPF and DMARC records live, which are worth adding alongside the records that verify your domain.
Email addresses
Step 3 of setup creates your first sending address. From Settings → Email, under Email addresses, click Add FROM address to add more - up to however many your plan includes.
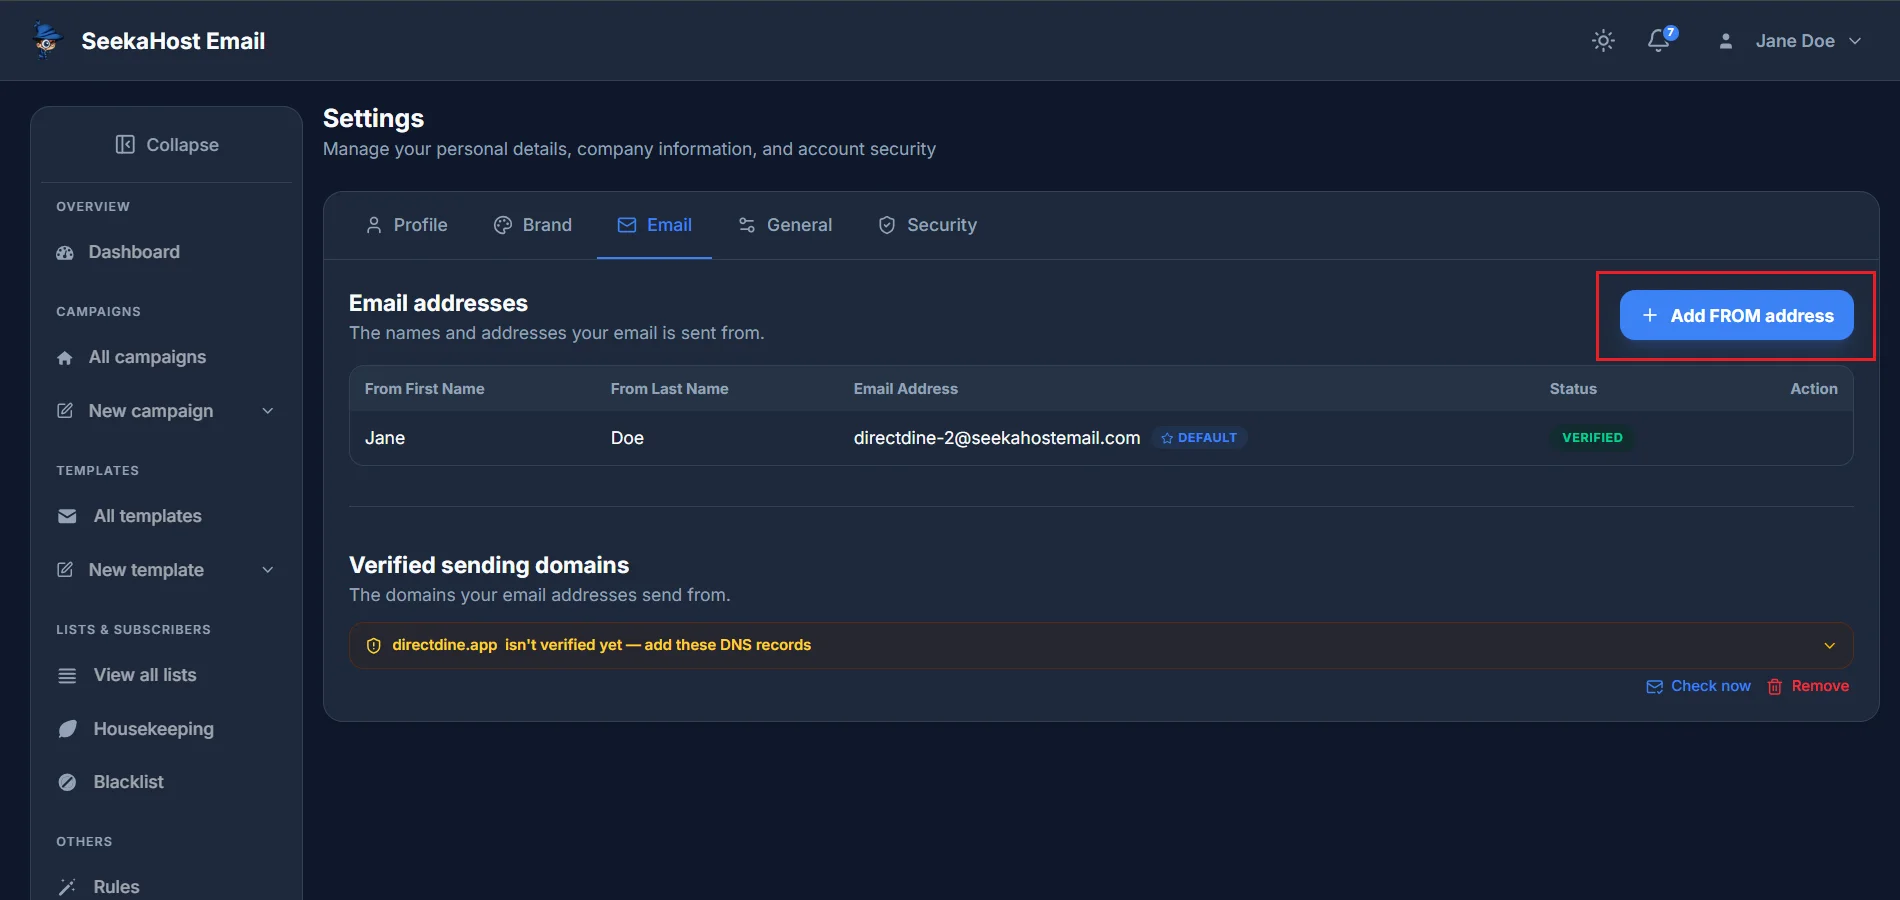
Choose SeekaHost address for something ready to send with straight away, My own domain to send as you@yourcompany.com once that domain's DNS is verified (the records for this are covered below), or My email address to send as a Gmail, Outlook or Hotmail address you confirm by clicking a link. Type the address - we check it's available as you type - along with a From first and last name, and you'll see exactly how it'll appear to recipients before you confirm.
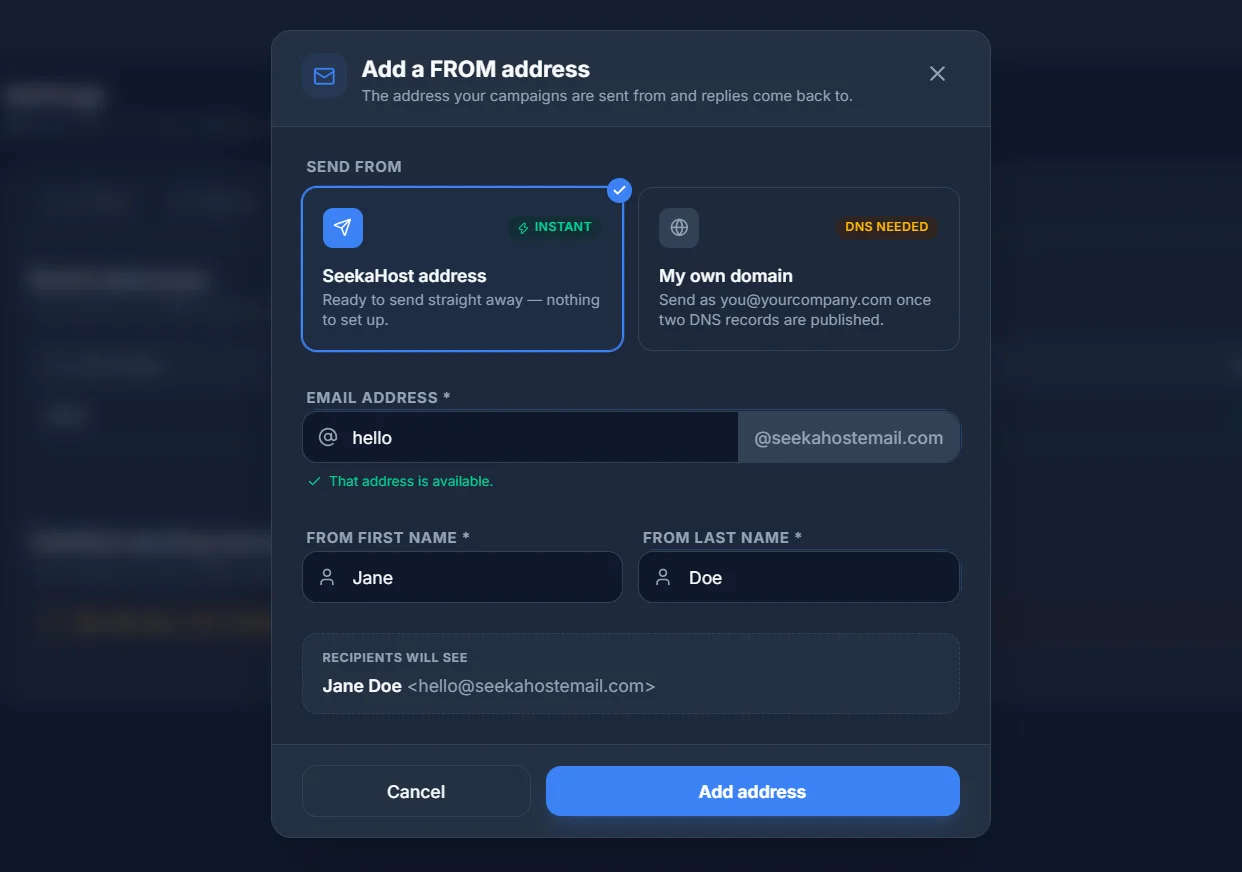
One address is always marked DEFAULT - that's the one your campaigns actually send from. Use Set as default on any verified address to switch, or Delete to remove one you no longer need.
Adding a domain
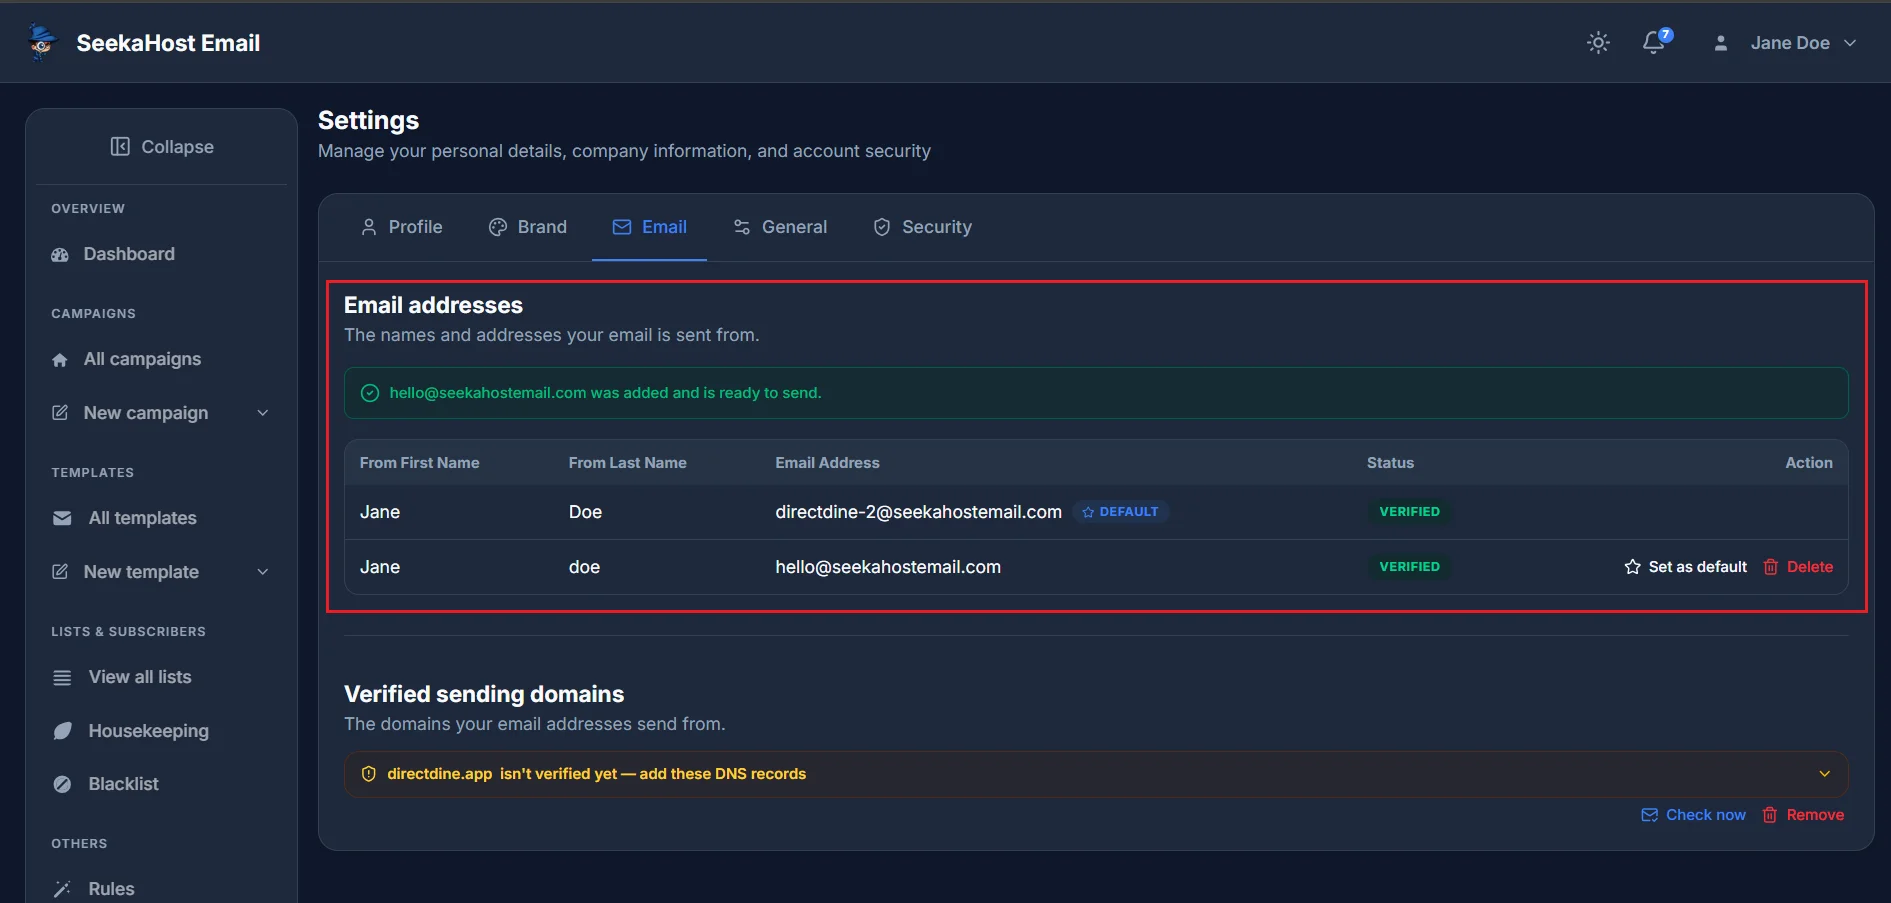
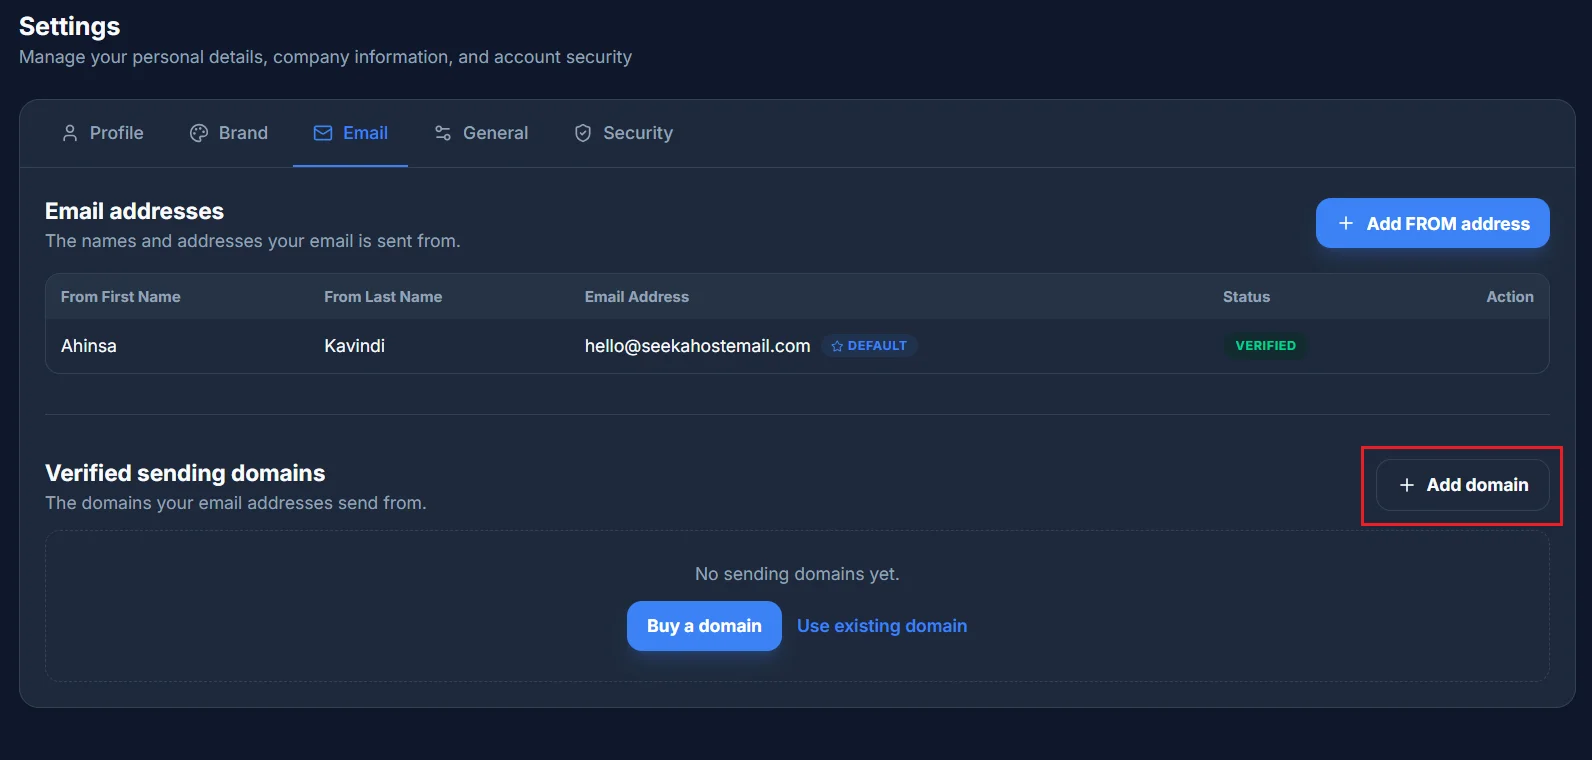
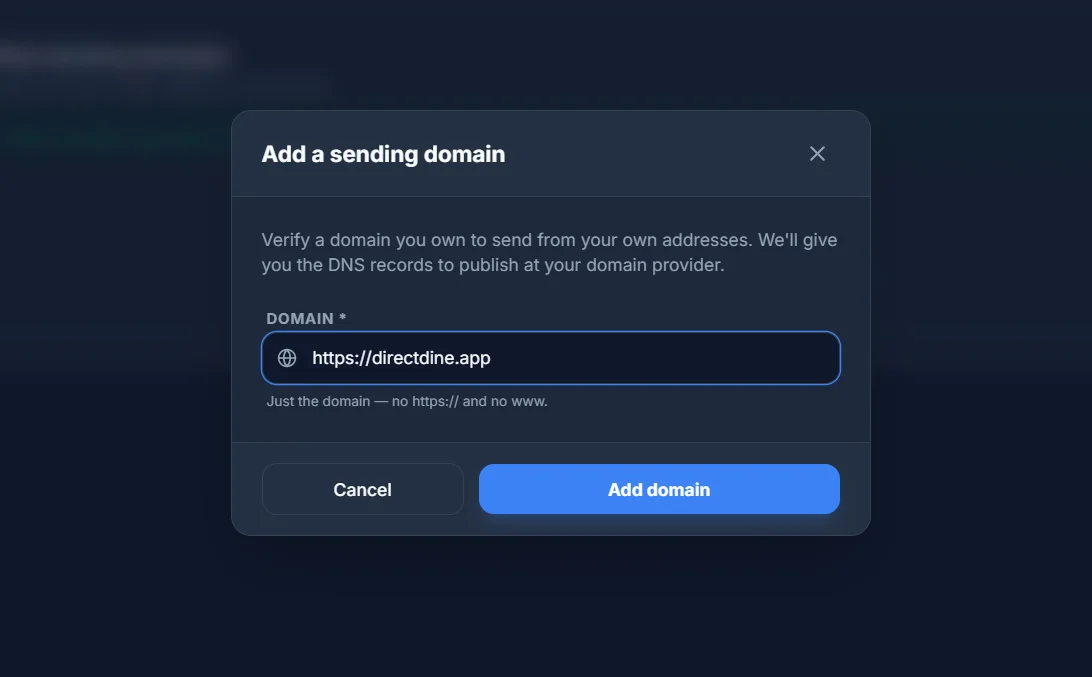
Open Settings → Email and find Verified sending domains. Click Add domain and type the domain you want to send from. You're not limited to the one domain you started with - you can claim more later, up to however many your plan includes. If you're already using all of them, you'll see exactly that: how many your plan covers and that you're using all of them.
The DNS records
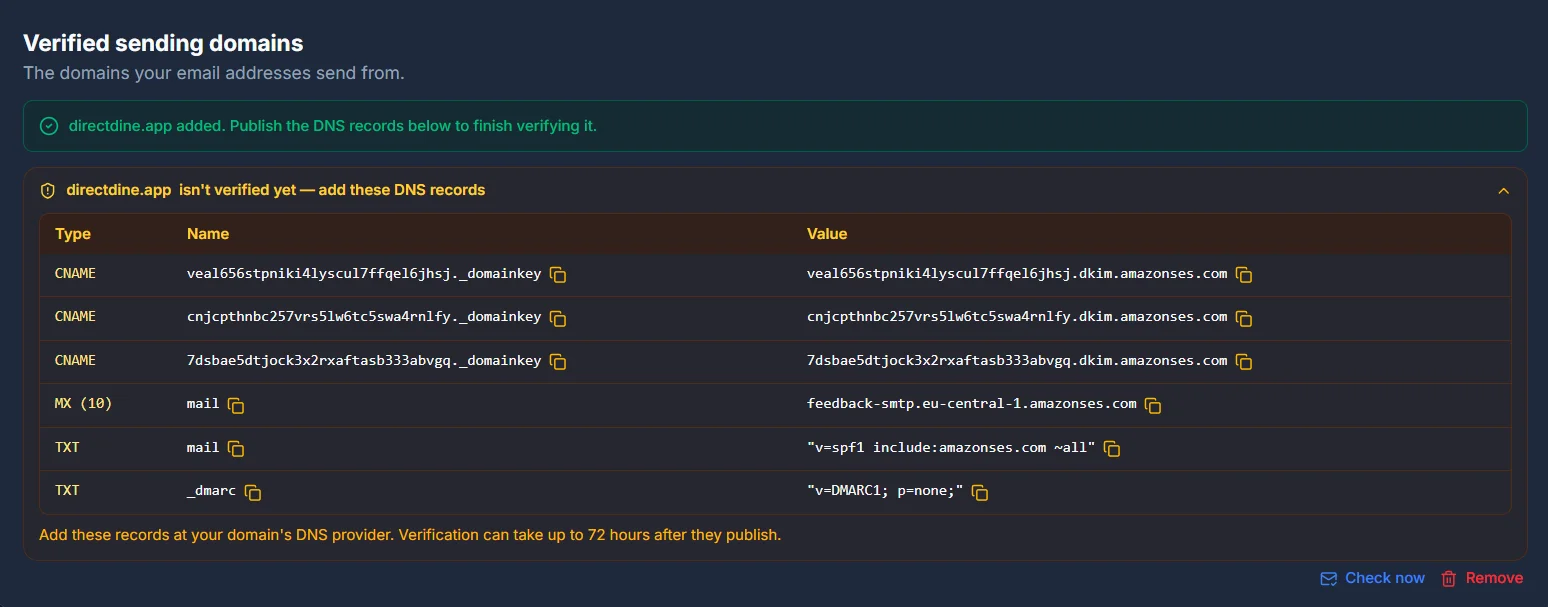
Once you've added a domain, we give you a table of four DNS records to publish wherever your domain's DNS is hosted:
- Three CNAME records (required) - these are what actually verify the domain, and they're also what signs your outgoing mail. There's no separate record just to prove ownership; these do both jobs.
- An MX record (optional) - routes bounce and complaint reports back to your domain.
- An SPF record (optional) - authorises Amazon SES to send on your behalf.
- A DMARC record (optional) - increasingly expected by Gmail and Yahoo, more on this below.
SPF
SPF authorises Amazon SES to send on your behalf - it tells other mail servers that SES is allowed to send mail claiming to be from your domain. It's optional, but genuinely helps your mail land in the inbox.
DMARC
DMARC isn't something SES itself requires, but Gmail and Yahoo now expect one from anyone sending bulk mail - in practice, it's effectively a must-have even though it's optional here. The record we give you starts in report-only mode, which only asks for reports and doesn't change anything about how your mail is delivered.
How verification works
We check these by polling, not a live push the moment you publish them - most DNS changes take effect within a few minutes, though it can take up to 72 hours depending on your DNS provider.