Whenever you pick a paid plan - whether that's during onboarding or later when upgrading from Billing - you're taken to a short checkout inside the portal before your subscription starts.
The three checkout steps
- Billing - your details and billing address.
- Payment - your card details.
- Review - confirm everything and pay.
You can go Back to an earlier step at any point before confirming.
Step 1: Billing
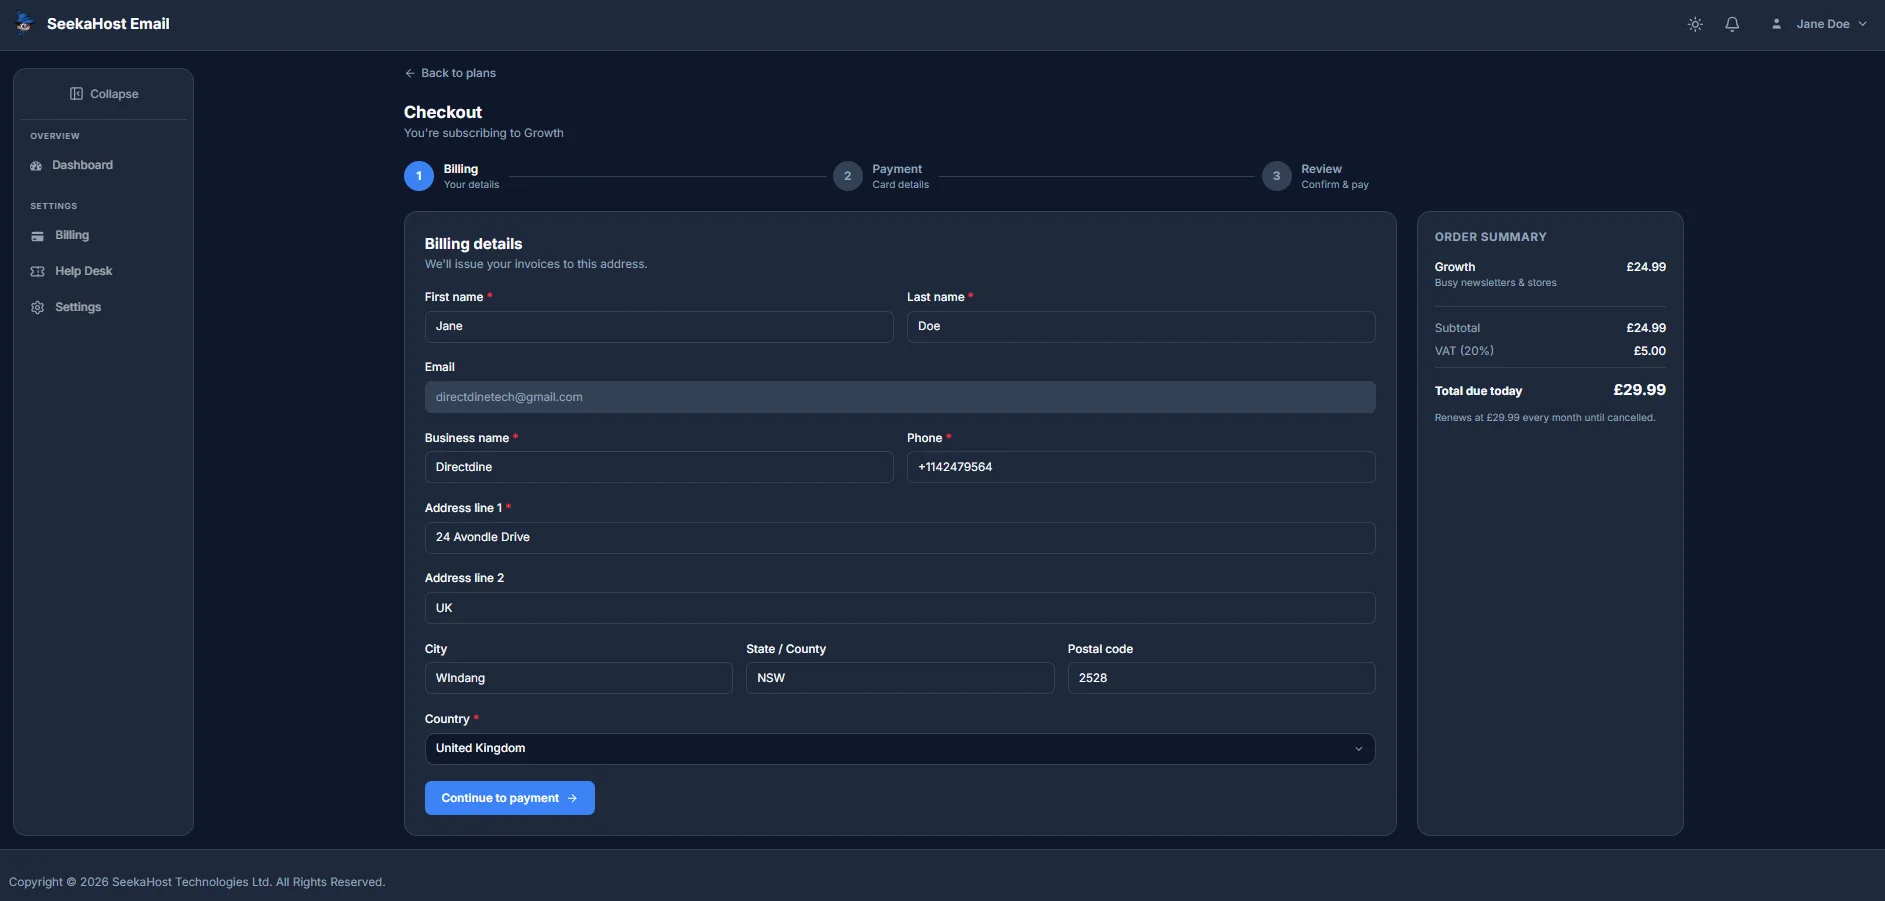
Confirm who the subscription and invoices belong to:
- First name, Last name and Business name - required.
- Email - pre-filled with your account email and can't be changed here.
- Phone and Address line 1 - required.
- Address line 2, City, State/County and Postal code - optional.
- Country - required.
The order summary on the right shows your plan, subtotal, VAT and the total due today, including when your subscription will next renew. Click Continue to payment once everything looks right.
Step 2: Payment
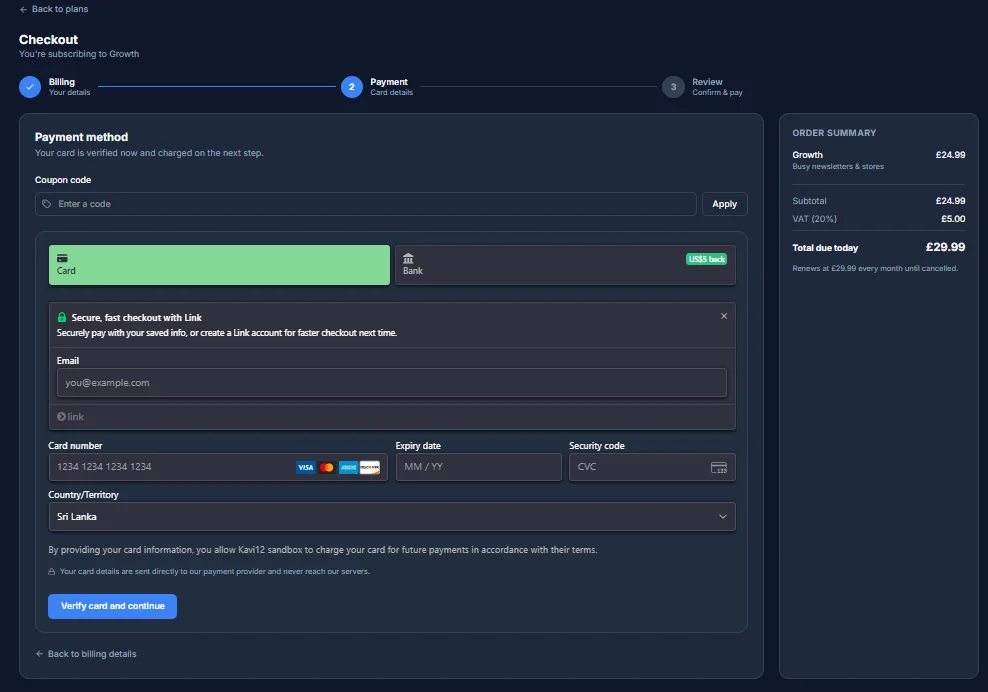
Enter your card details - card number, expiry date and security code. Your card is verified on this step but not charged yet; the actual charge happens on the next step, once you confirm.
- Coupon code - optional, applies a discount if you have one.
- Save my information for faster checkout - optional, offered by our payment provider for quicker checkout next time.
Your card details go directly to our payment provider and never reach our servers. Click Verify card and continue once it's filled in.
Step 3: Review - confirm & pay
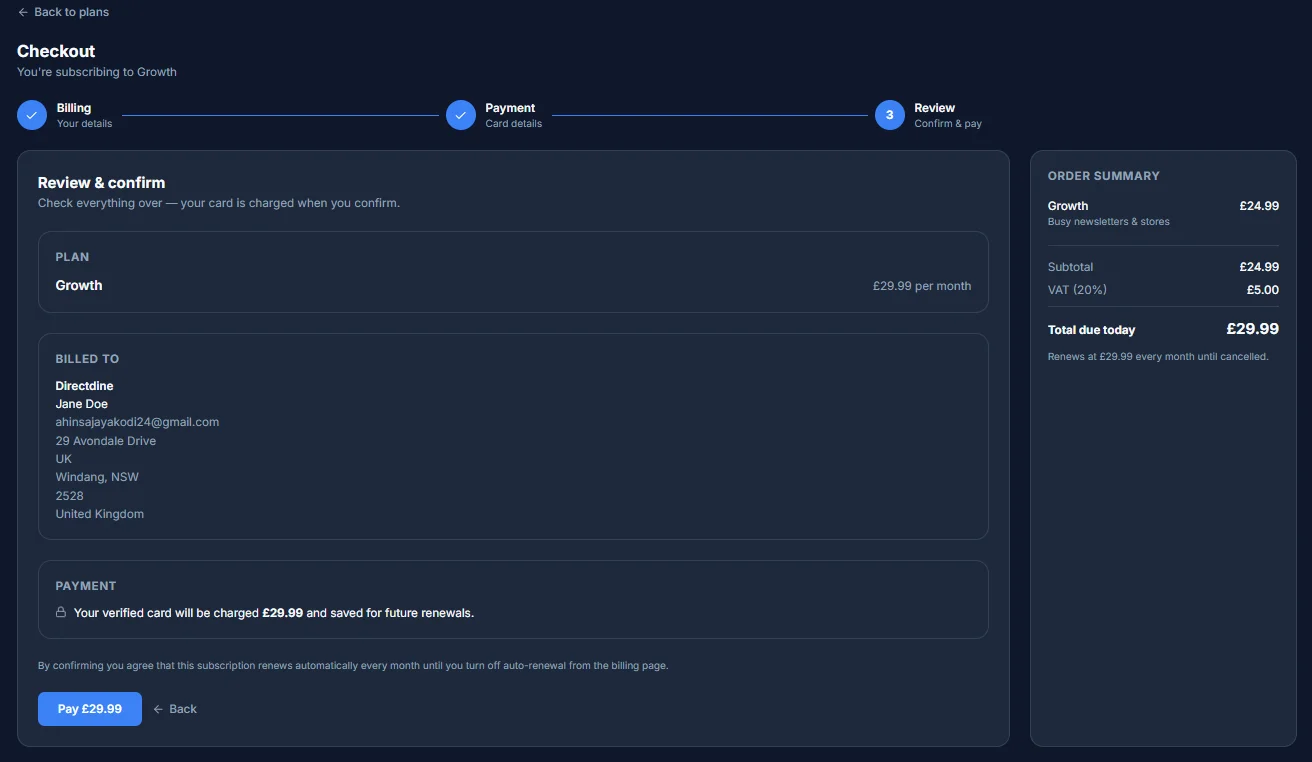
The final step lays out everything before any money moves:
- Plan - the plan name and its price per billing period.
- Billed to - the business name, contact and address you entered in Step 1.
- Payment - a plain statement of what will be charged and that your card is saved for future renewals (or, if a coupon covers the full price, that nothing will be charged at all).
Confirming means your subscription renews automatically every billing period until you turn off auto-renewal from the billing page - that's stated on this screen too, along with how long any discount applies for before renewals return to the full price.
Click Pay to confirm and complete your subscription (or Confirm and start, if there's nothing to pay). A few cards need one extra approval step here - if yours does, a dialog opens for you to approve the charge before it completes. Once confirmed, you're taken straight to your receipt.
Your receipt
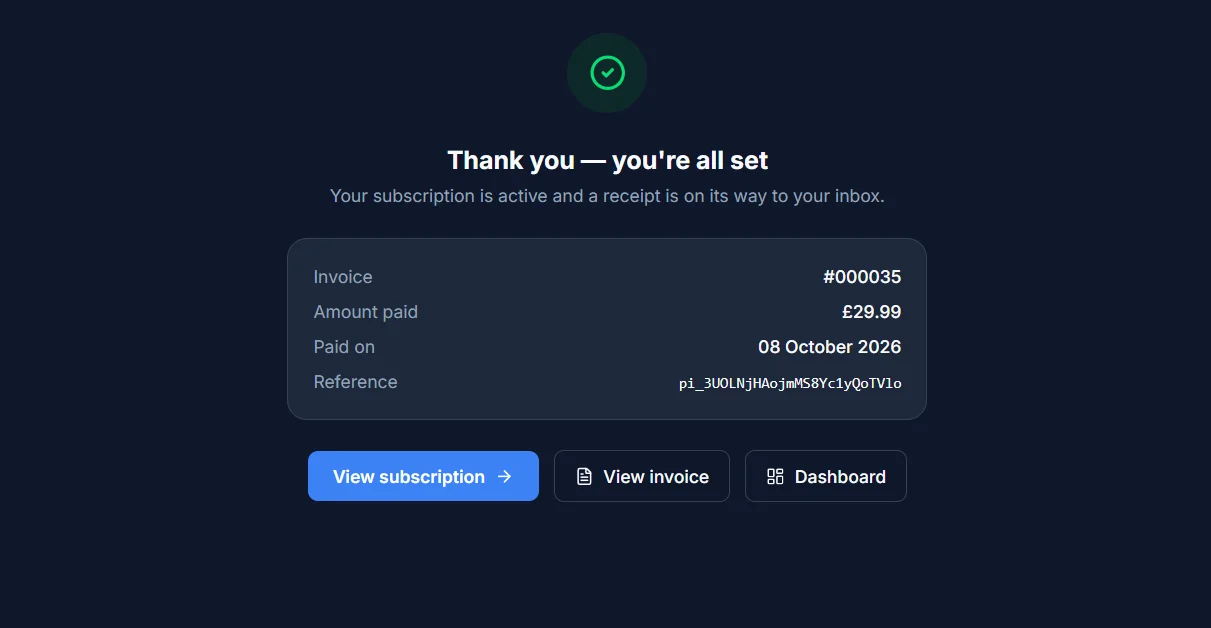
Once your payment goes through, you land on a confirmation page - "Thank you - you're all set" - with your invoice number, the amount paid, the date, and a payment reference. A copy of the receipt is also emailed to you.
From here you can jump straight to View subscription, View invoice, or back to your Dashboard.