
Right after you sign in for the first time, we'll walk you through a short setup wizard - a few quick steps, under a minute, before you're ready to send.
The five steps at a glance
- Your brand - your company name, website and phone number.
- Billing address - where your invoices are addressed to.
- Sending address - use your own domain, a ready-made SeekaHost address, or your Gmail, Outlook or Hotmail address.
- Verify your domain - only shown if you chose your own domain; publish a couple of DNS records to prove it's yours.
- Choose your plan - pick the plan that fits how much you send.
You can go Back to any earlier step at any point, and every detail you enter here can be changed later from Settings.
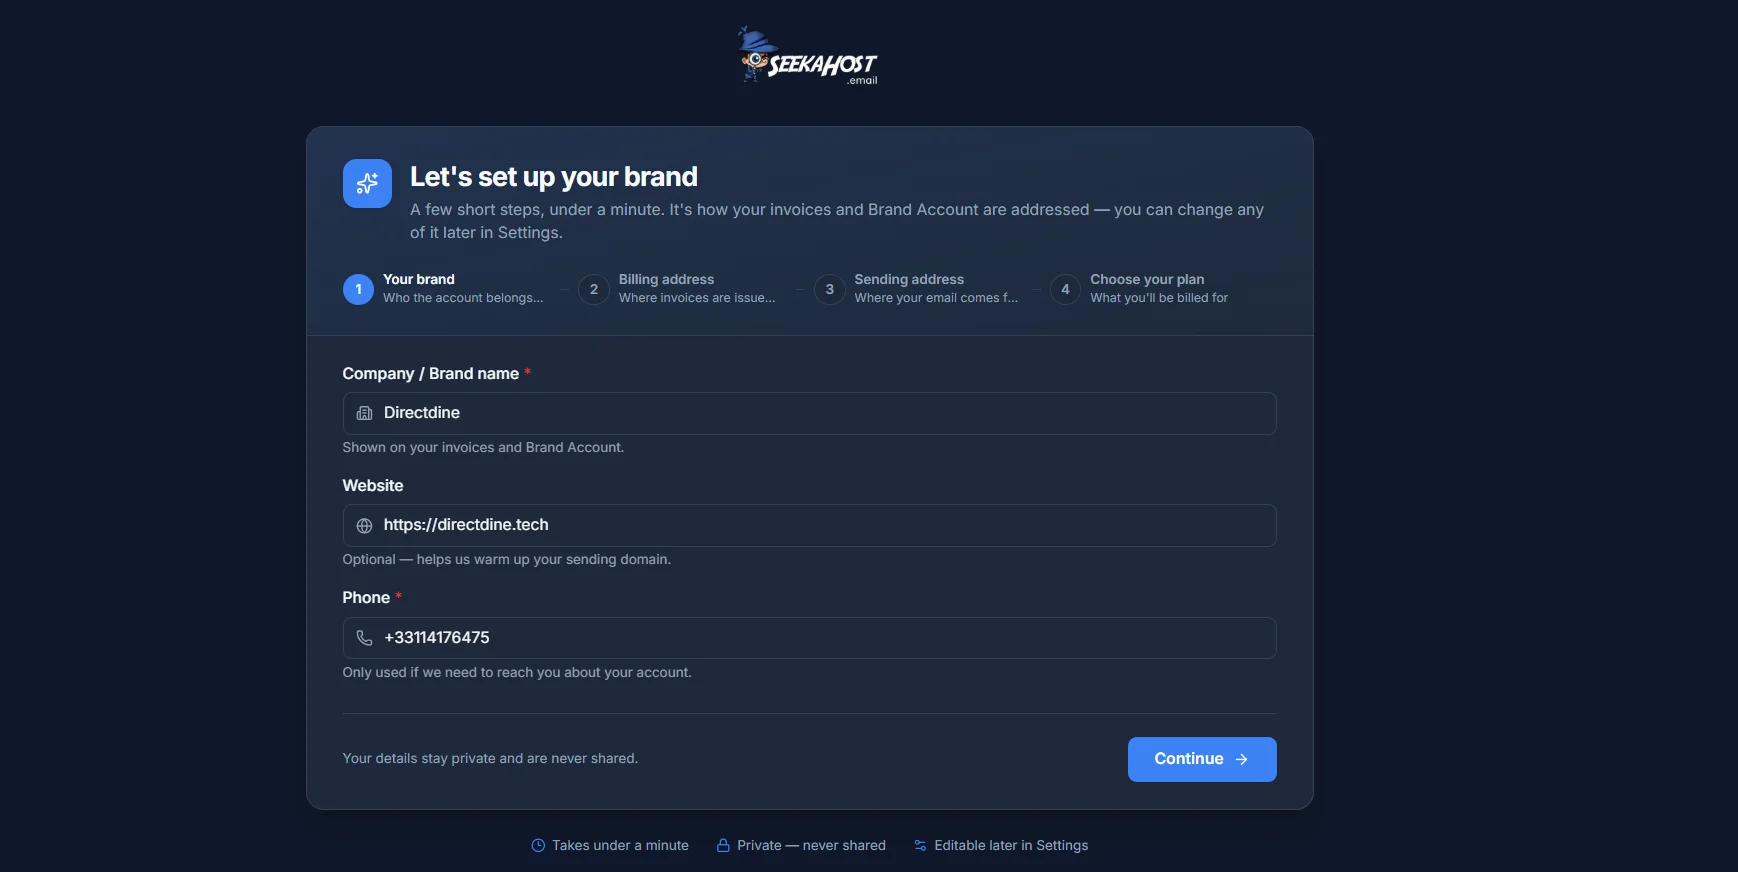
Step 1: Your brand
Tell us the name your invoices and account should be addressed to:
- Company / Brand name - required. Shown on your invoices and account.
- Website - optional. Helps us warm up your sending domain.
- Phone - required. Only used if we need to reach you about your account.
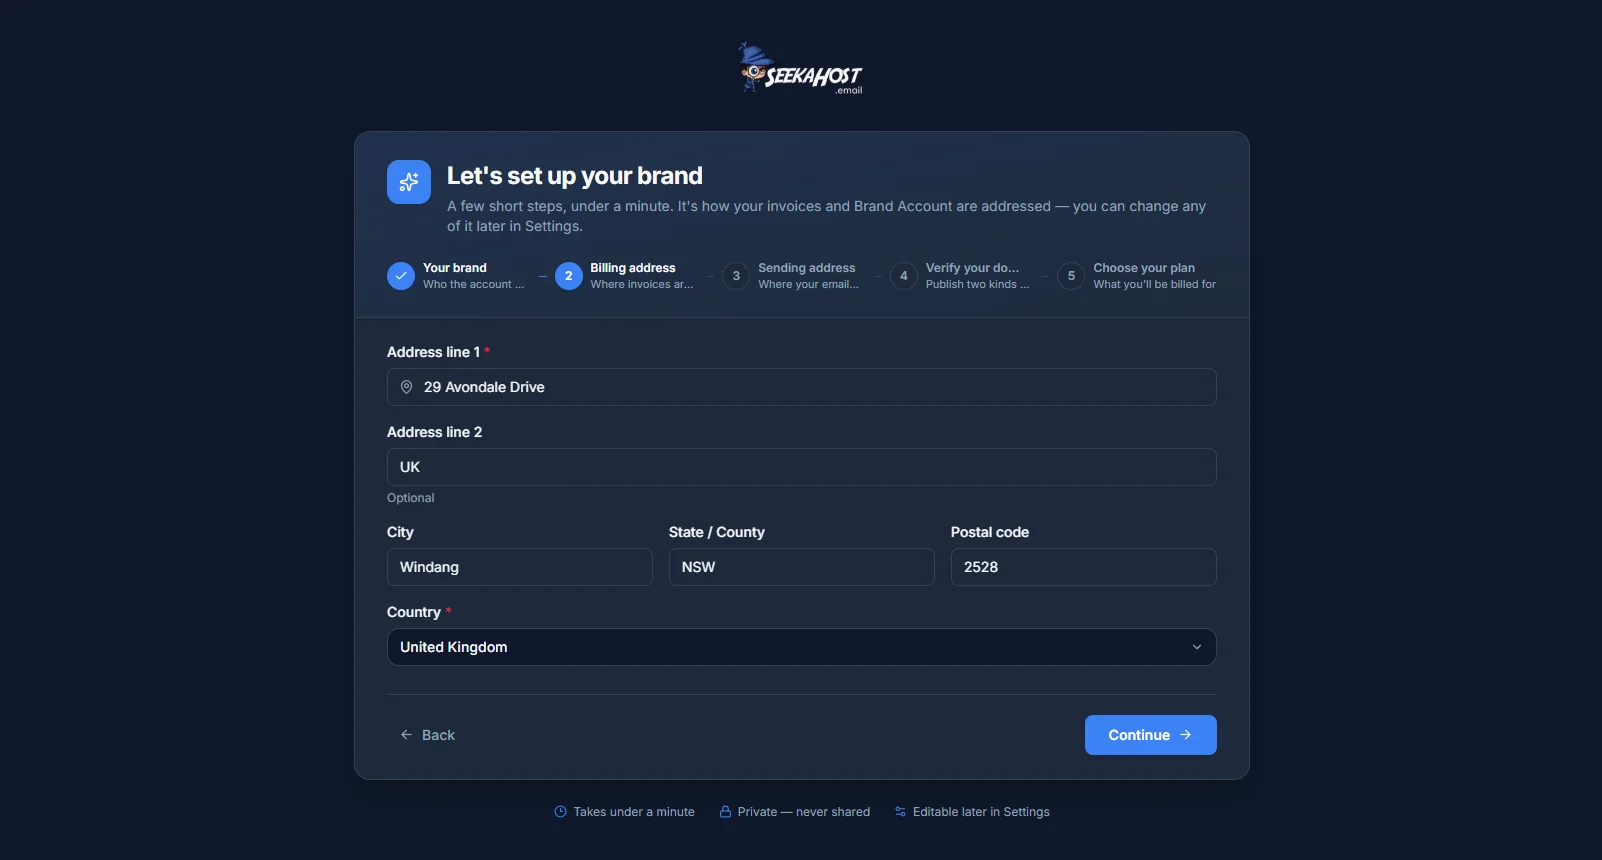
Step 2: Billing address
This is the address that appears on your invoices.
- Address line 1 - required.
- Address line 2, City, State/County and Postal code - all optional.
- Country - required.
Step 3: Sending address
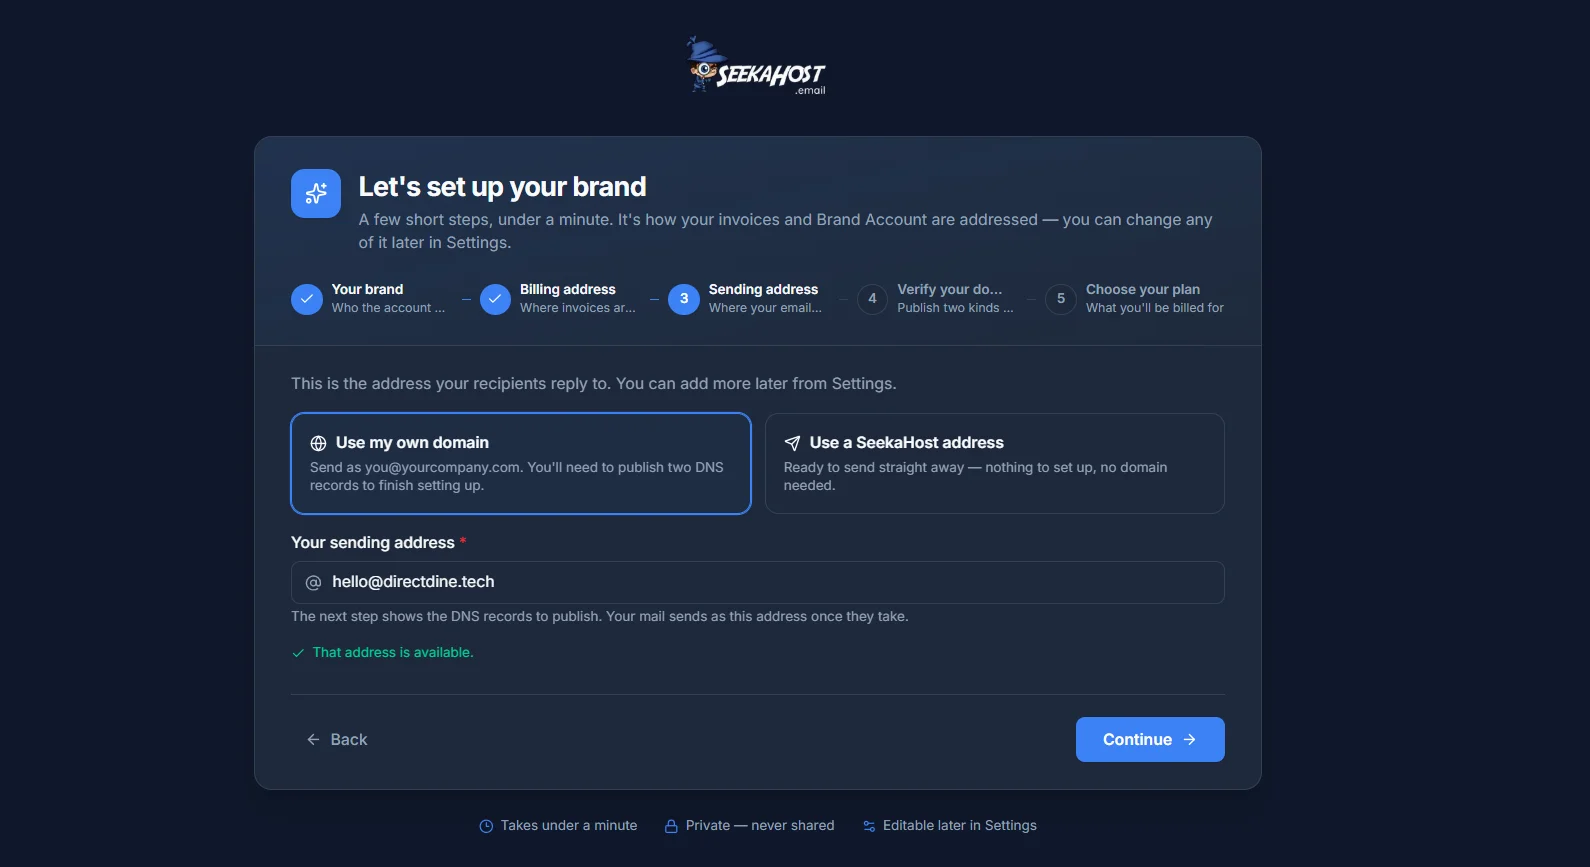
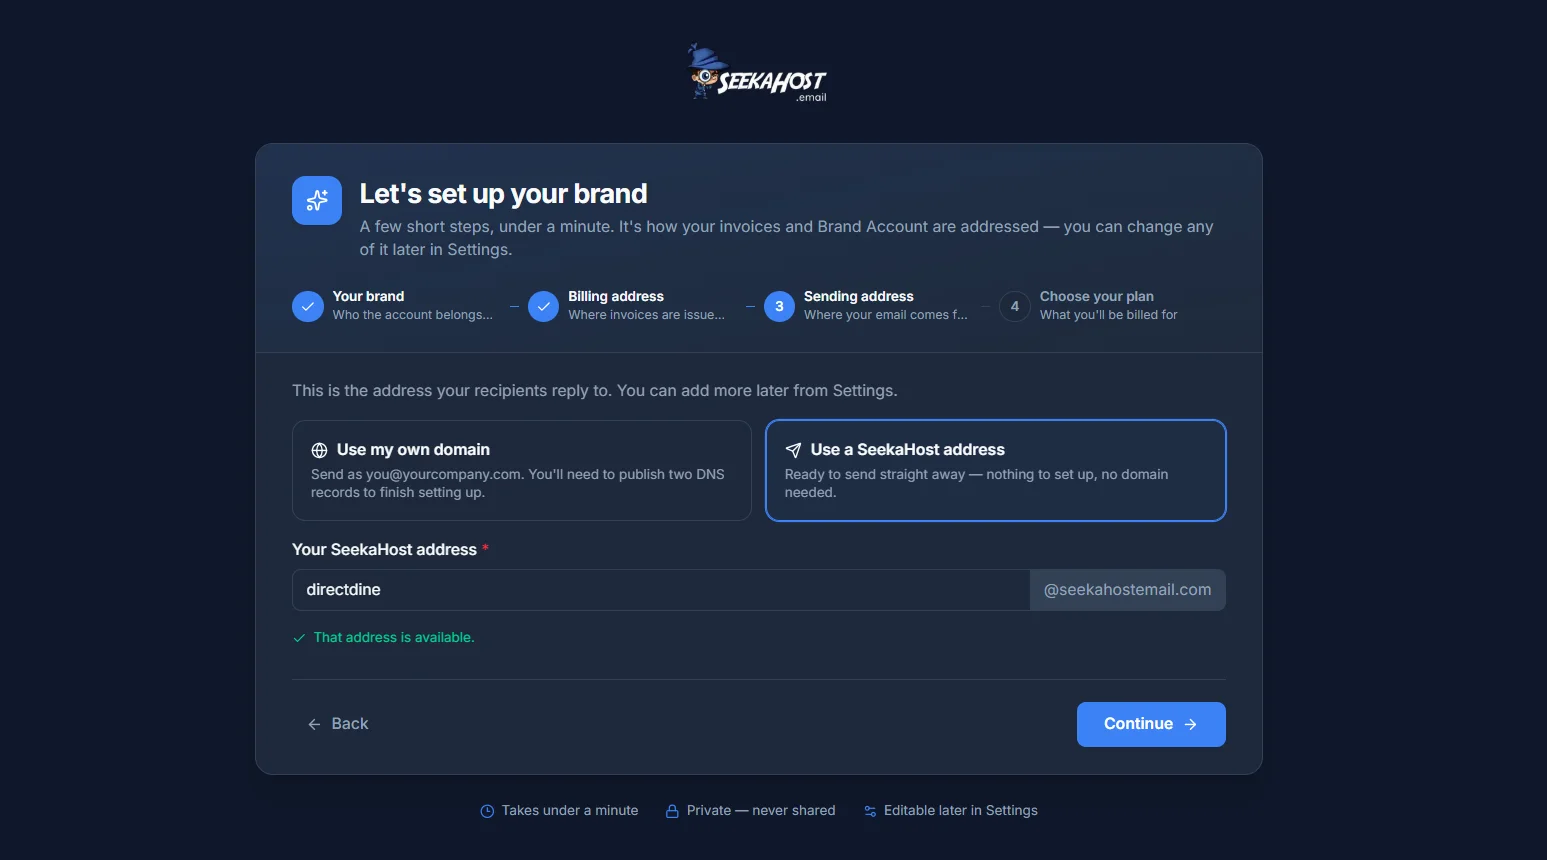
This is the address your emails are sent from, and the one your recipients reply to. You have three options:
- Use my own domain - send as you@yourcompany.com. You'll need to publish two kinds of DNS record to finish setting up (the next step walks you through this).
- Use a SeekaHost address - ready to send straight away, nothing to set up, no domain needed.
- Use my email address - send as your Gmail, Outlook or Hotmail address. There's no DNS step: once your account is set up we email the address a confirmation link, and it can send once you click it. If you signed up with one of these addresses, it's filled in for you.
Whichever you pick, type your preferred address and we'll check it's available before you continue. Your own domain gives you the best inbox placement - the other two are quicker to start with.
Step 4: Verify your domain
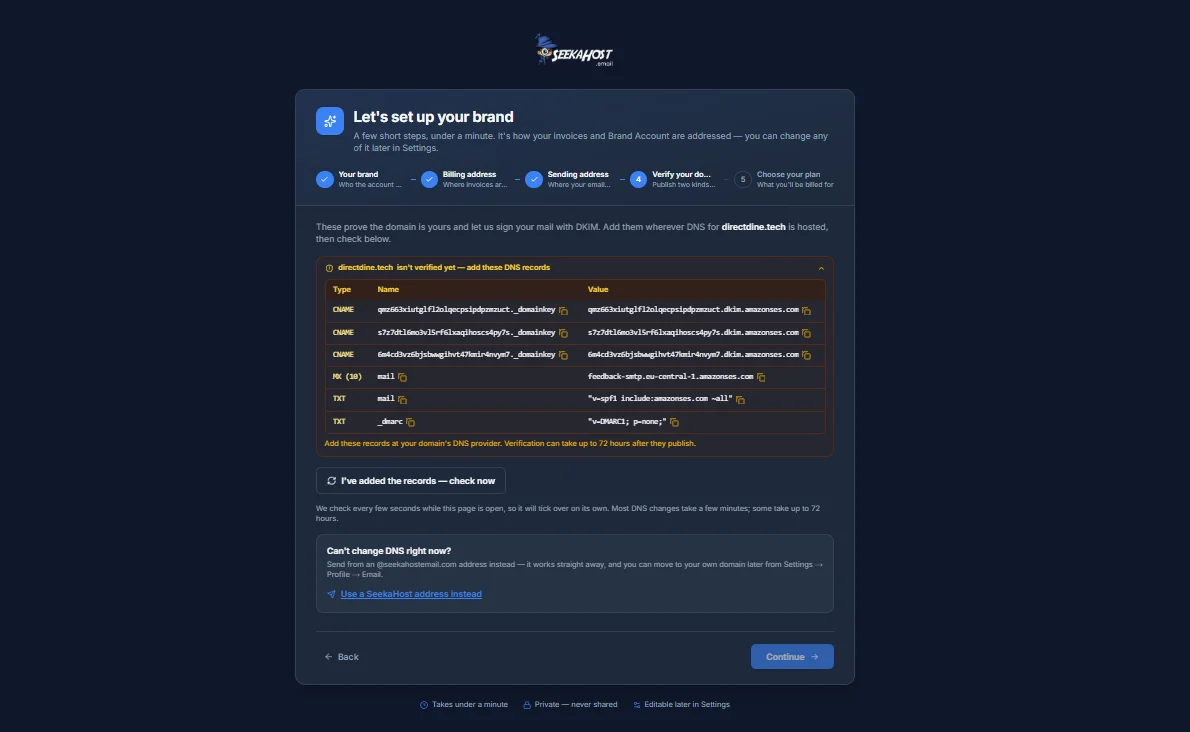
This step only appears if you chose to use your own domain in Step 3 - pick a SeekaHost address instead and it's skipped entirely. To prove the domain is yours and let us sign your mail with DKIM, add the records shown to your domain's DNS:
- Three CNAME records - these are what actually verify the domain.
- An MX record - routes bounce and complaint reports back to your domain.
- TXT records for SPF and DMARC - recommended extras that improve trust with Gmail, Yahoo and other inboxes.
Add these wherever your domain's DNS is hosted, then click "I've added the records - check now." We also check automatically every few seconds while this page is open. Most changes take effect within a few minutes, though it can take up to 72 hours depending on your DNS provider.
Step 5: Choose your plan
Pick the plan that fits how much you send - you can always change plans later from Billing.
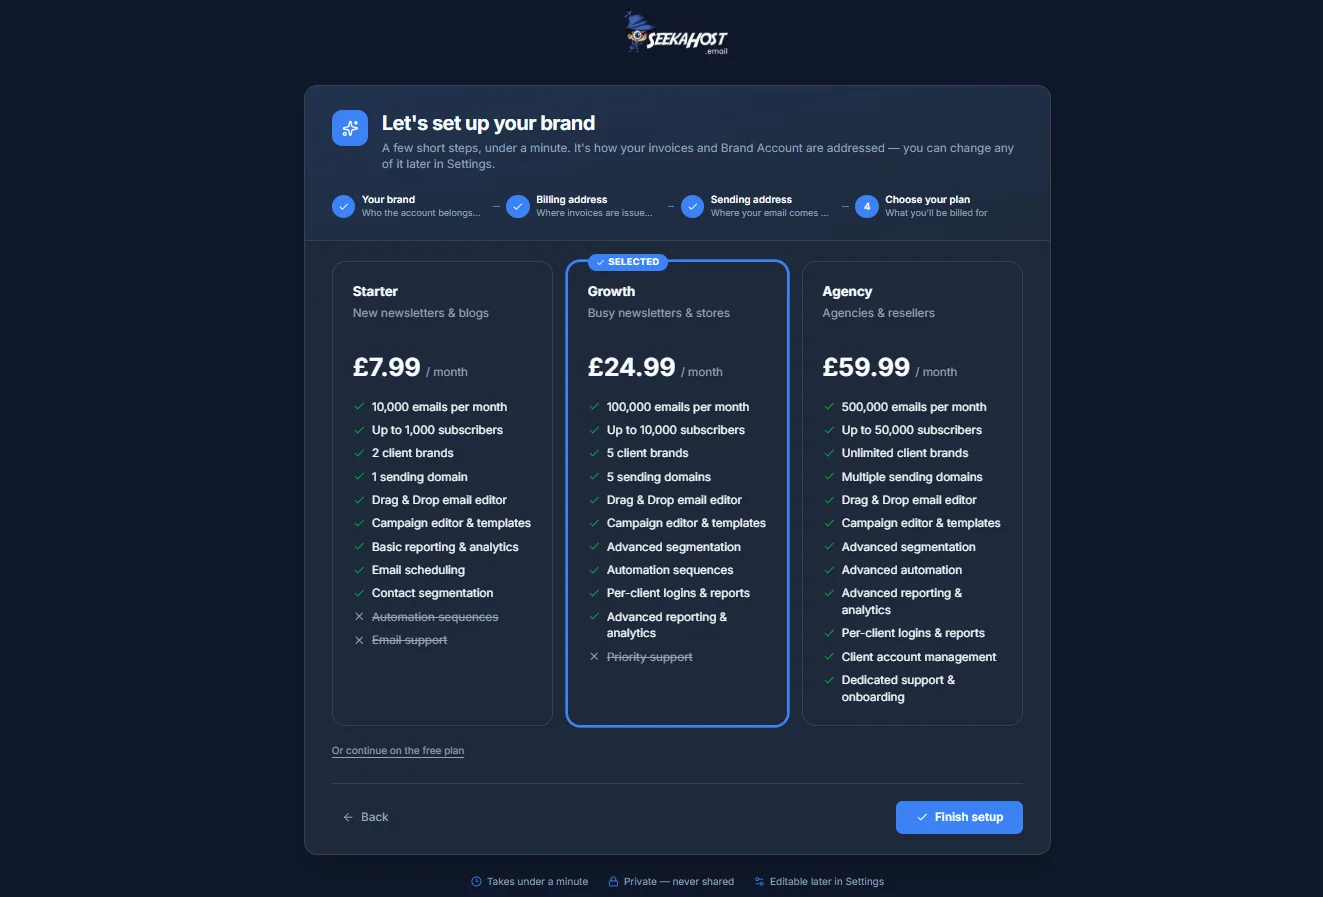
Click Finish setup. If you picked a paid plan, you'll go straight to checkout to add your billing details and payment method next.